Battlegrounds launched, with a whole new map to get a feel for and a great fervor from many players to become familiar with it as they did the new game play as well. Still, there are other players who are not as suave with this new map, and it can be tricky to read at times. With all the graphics and needing to click on a sector to see the coordinates it can seem very overwhelming. Once you understand the map though it becomes frightfully easy to work with. You just have to get there.
The first thing that players really keyed in on is that each sector has a unique name, and a unique coordinate. This gave rise to a letter-number-letter abbreviation to help lead guilds around on the map. This works for a lot of players, but can still be rough if you don’t know your way around.
Our new map consists of four tiers of circles, with up to 8 guilds all starting in the fourth tier and having three sectors they can always connect to from said starting point. The fourth ring is the outermost one, and the one with the least amount of victory points (VP) per hour. The exact VP/hr on a sector will switch up each battlefield, so there are no designated “power point” sectors like it is in GvG, where the sectors always remain static and the more trees the better the rewards. You’ll know a sector is in the fourth ring because the number in the abbreviation is a “4”. The third ring has slightly more VP/hr on its sectors than the fourth ring, and is denoted by a “3”. There are half as many sectors in the third ring as there are in the fourth ring. Similarly there will be half as many in the second ring as there are in the third, and half as many in the first ring as there are in the second one. Likewise, VP/hr continues to improve as you work towards the center, and the second ring is denoted by a “2” and the first (and center) ring is denoted by a “1”.
There are four sectors in the center ring, eight sectors in the second ring, sixteen sectors in the third ring, and thirty-two sectors in the outer ring. Of the thirty-two sectors in the outer ring, eight of them cannot be taken and do not generate VP/hr because they are the home base for each guild in the tournament. This means that the map consists of fifty-two sectors you can attack and potentially own.
Now, I don’t know what the developers at Inno were taking when they came up with the actual names of these sectors, but I’d like some. They’re totally bizarre, and I’m sure the pronunciations in each player’s head vary greatly. This likely plays a larger part in why most players do not refer to the the whole name, but instead just the first letter of the sector name.
The rings as well all follow bits of alphabet. Despite the really bizarre names that Inno’s developers gave the sectors, they did follow a method when it came to the initial coordinates in the circles. So you can see the patterns when you look at it as a whole. Please note that from here forward, everything is as it relates to a session that has 8 guilds. When there are less guilds, you’ll see the colors shift and sectors that aren’t normally available to take will pop up. Since this is a-typical it is not included here.
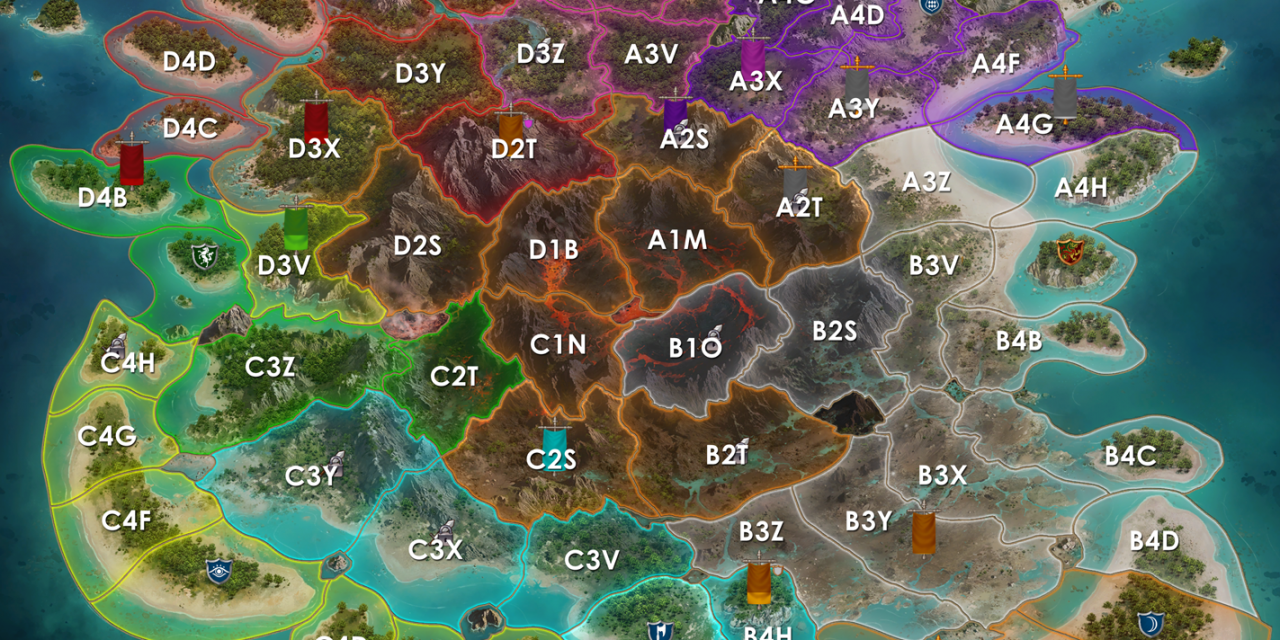
This is what our map looks like (with some GBG activity happening) when we look at it, colors will vary. Your guild will always be white, but the colors of surrounding guilds do differ a bit. The same colors are always used for each section (or so it seems), so you’ll just replace the color on your map with white. Other guilds will see you as that particular color.
That being the case we’ll see the following for colors:
- Home Base 1, between D4H and A4B: Pink (A4A)
- Home Base 2, between A4D and A4F: Purple (A4E)
- Home Base 3, between A4H and B4B: (Dark) Blue (B4A)
- Home Base 4, between B4D and B4F: Orange (B4E)
- Home Base 5, between B4H and C4D: Cyan (or Light Blue) (C4A)
- Home Base 6, between C4D and C4F: Yellow (C4E)
- Home Base 7, between C4H and D4B: Green (D4A)
- Home Base 8, between D4D and D4F: Red (D4E)
So in this instance my guild was showing as a dark blue for all other teams, but it’s white for us. Clicking on the home base for any of the guilds will open up their guild profile, should you be curious.
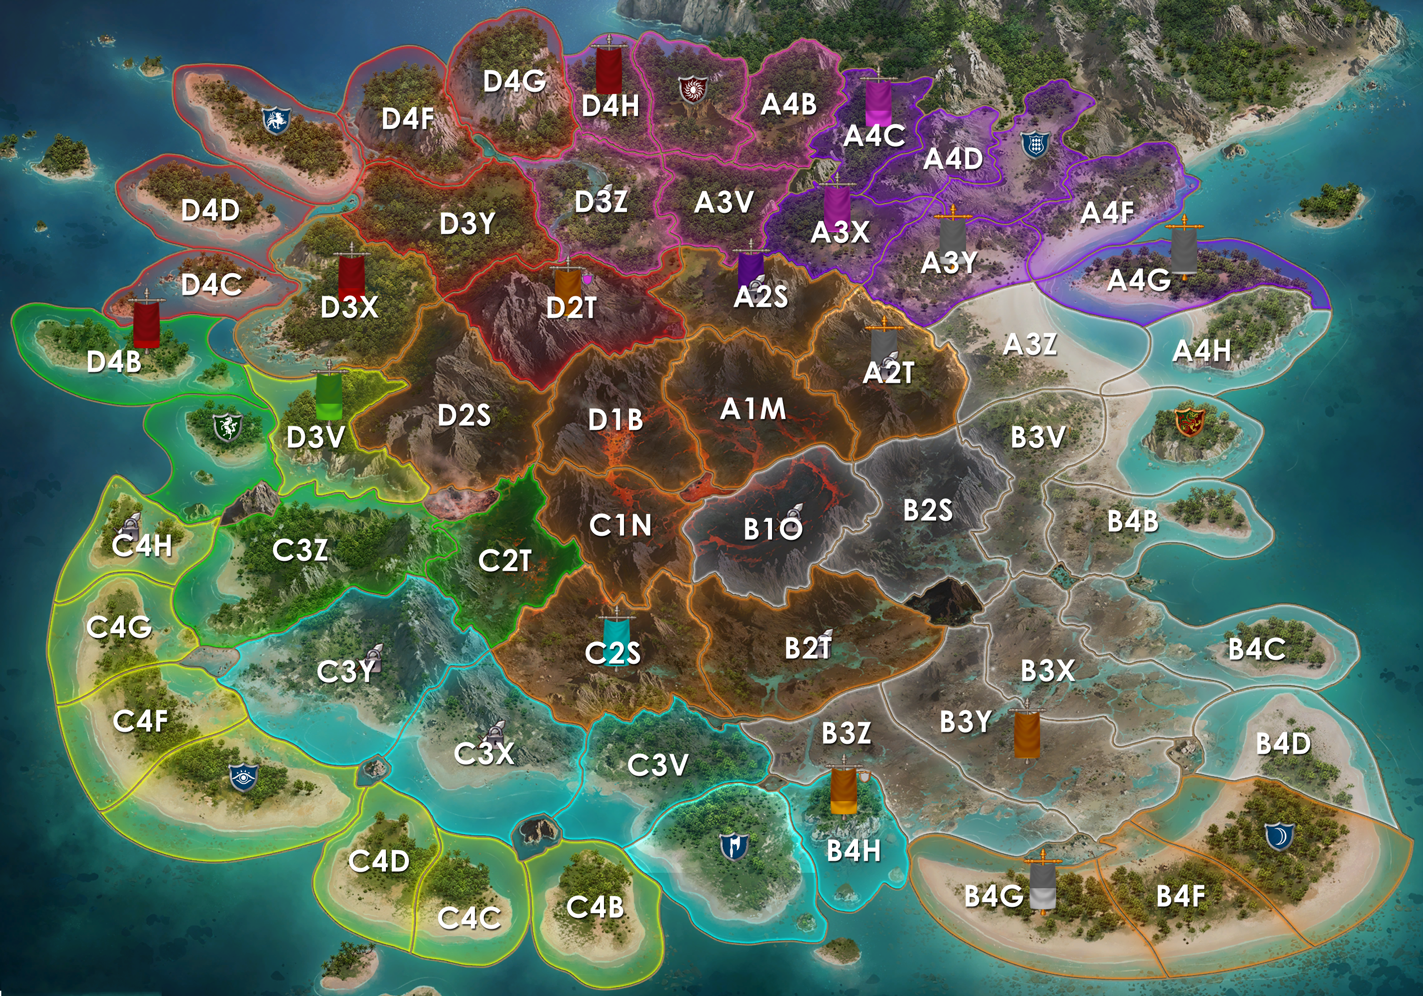
On the above map I have overlaid all the coordinates as they are typically called out in their letter-number-letter abbreviation. The outer ring goes A-H, with the home bases taking the places of “A”s and “E”s. The third ring has V-Z, but skips the letter “W”, presumably because it’s too close to the letter “V”. Second ring consists of “S” and “T”, and then the inner ring is what it is, “A”, “B”, “C”, and “O”. This allows for the unique call tags though, because nothing is able to repeat. And, they go in order in a clockwise fashion, always, starting at top-center where it’d be a 12 on an analog clock.
For some this map can be overwhelming, so to make it easier lets take a look at two other views: one that is the overlay, but with block colors, and one that is just the outline.

This is the same map, but I’ve given the rings unique colors to make it a bit simpler to view. The dark purple is the fourth tier, with the light gray plus red shields denoting each home base. The third ring is in light blue, followed by the second ring in green. Finally the inner circle or first ring is yellow. Anything that is dark gray are little areas that cannot be fought over, and just break the sectors up. You can attack adjacent sectors from any that you currently hold, regardless of if they are connected to your home base. That means that you can own sectors all over the map and be an utter nuisance to the rest of the guilds if you have the desire and the manpower to be an absolute troll.
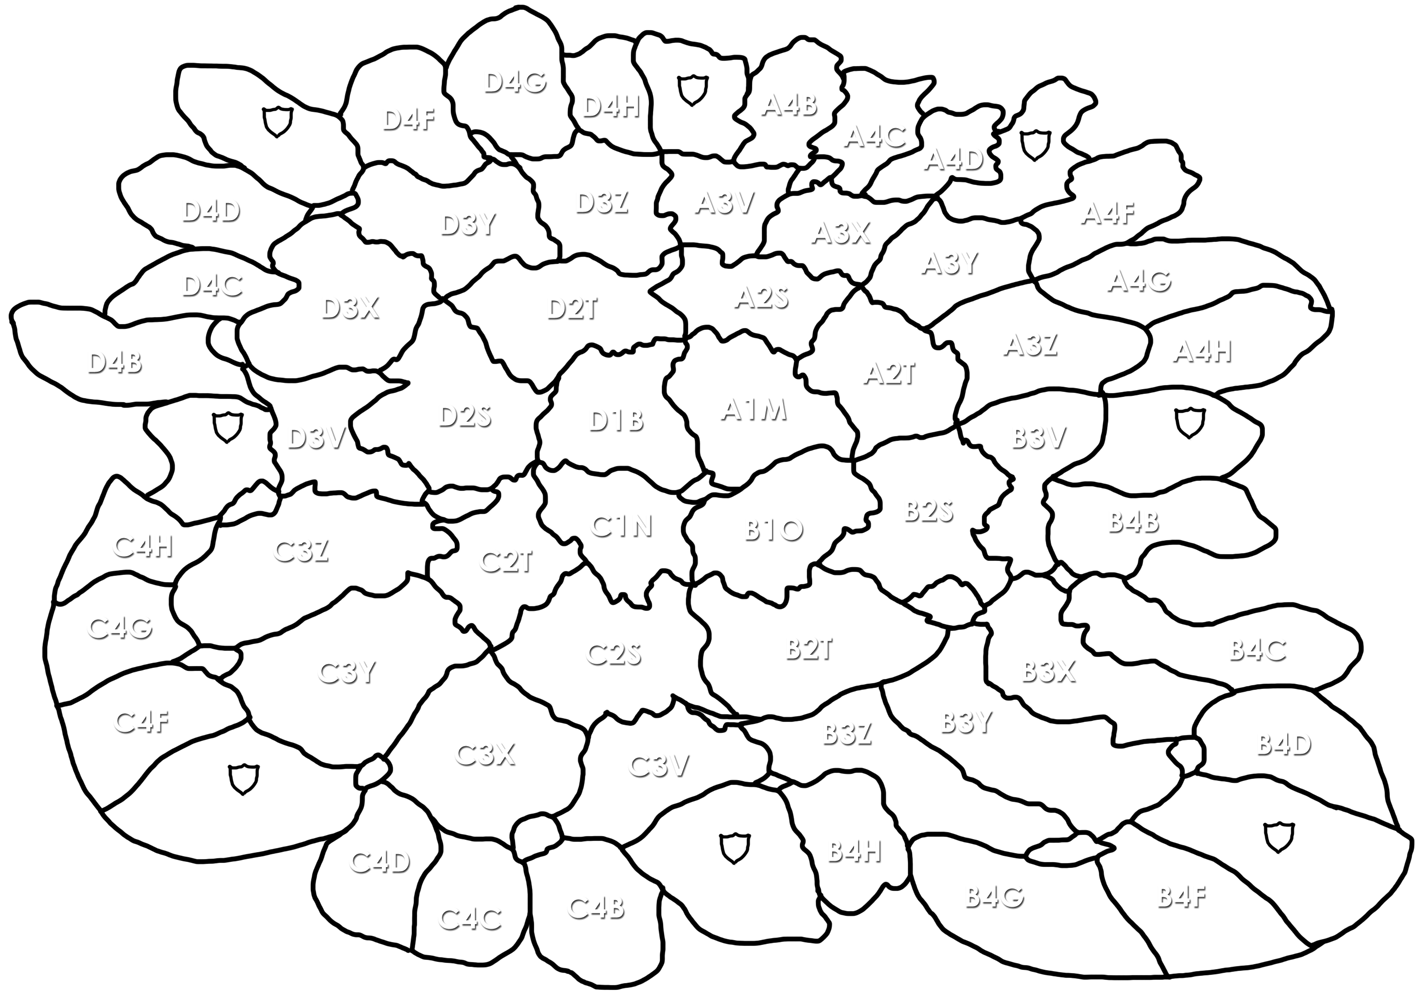
Finally, a map with nothing but the coordinates for those who work best with the bare bones. Again, it’s the same exact map as the two above, but all the colors and graphics have been removed (and yes I enjoyed tracing the map with my tablet if you were wondering). The little dollops with no coordinates are those same areas that just break things up and cannot be attacked.
I mentioned that the sectors have really weird names right? They really do. Here is a listing of all the coordinates with their names. If they weren’t made in an altered state of mind, then I think it was cats walking on keyboards or something.
- Fourth Ring
- A4B: Bangma Mynia
- A4C: Cuatishca
- A4D: Dilandmoor
- A4F: Frimoandbada
- A4G: Gosolastan
- A4H: Hasaint
- B4B: Bliclatan
- B4C: Capepesk
- B4D: Dalomstates
- B4F: Fradistaro
- B4G: Goima
- B4H: Hranreka
- C4B: Bangne Casau
- C4C: Cagalpo
- C4D: Denwana
- C4F: Francedian
- C4G: Guayla
- C4H: Hoguay
- D4B: Basainti
- D4C: Camehermenle
- D4D: Dabiala
- D4F: Finnited
- D4G: Guayre Bhugera
- D4H: Honbo
- Third Ring
- A3V: Vobolize
- A3X: Xemga
- A3Y: Yelili
- A3Z: Zamva
- B3V: Vishrain
- B3X: Xidorpupo
- B3Y: Yepadlic
- B3Z: Zilsier
- C3V: Vilipne
- C3X: Xistan
- C3Y: Yeraim
- C3Z: Zeaslo
- D3V: Verdebu
- D3X: Xiwait
- D3Y: Yerat
- D3Z: Zilgypt
- Second Ring
- A2S: Sladisk Icro
- A2T: Tevomospa
- B2S: Subeblic
- B2T: Taspac
- C2S: Shadsterning
- C2T: Tayencoria
- D2S: Slandmonii
- D2T: Tachmazer
- First Ring
- A1M: Mati Tudokk
- B1O: Ofrus Remyr
- C1N: Niali Diath
- D1B: Brurat Andgiry
So when it comes to calling sectors teams will use various ways. It can be by color, ring, coordinates, names; or a combination there-of. Regardless, there is a way to specify sectors and as you get used to the map it will be easy to find them. If not, just refer back to these images and you’ll be able to match things up. All you need to do to know if you’ve got the right sector is to click on it, and upon opening it will be splashed across the top, such as “A1: Mati Tudokk”.
Recent Comments