Inno Games uses a lot of symbols to help represent things when it comes to what your city produces, or what certain buildings require and may produce. To many this becomes second nature, and as you see the symbols you just get used to them and go on your merry way. For the beginner though, especially now with some more recent updates, it can be a bit overwhelming. So hopefully this helps to break down and explain what you’re looking at.
![]()
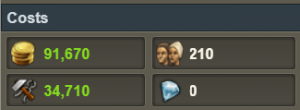
Coins: This will either refer to a specific amount of coins you will receive upon collection OR a percentage boost to all coin collections you make in your city. To know which it is look at the flavor text next to it, and see if it is a whole number or a percentage. In the case of a Great Building giving a coin boost (percentage boost) the number of collections during which it’s active will likely be limited, and indicated in the flavor text. These can also be found under the cost of planting standard buildings in your city, which means you must pay that amount to plant the building. Any reduction bonuses from your guild level will be reflected in what you see.
![]()
Supplies: This will either refer to a specific amount of supplies you will receive upon collection OR a percentage boost to all supply collections you make in your city. To know which it is look at the flavor text next to it, and see if it’s a whole number or a percentage. These can also be found under the cost of planting standard buildings in your city, which means you must pay that amount to plant the building. Any reduction bonuses from your guild level will be reflected in what you see.
![]() Medals: This indicates the number of medals that a user will receive upon collection. Medals can be used for various things in game, such as victory expansions, fighting on the All Ages map in GvG, and buying more GE attempts to name a few. Eventually you will hit a point where medals aren’t terribly important anymore, so this is usually not the most exciting of rewards.
Medals: This indicates the number of medals that a user will receive upon collection. Medals can be used for various things in game, such as victory expansions, fighting on the All Ages map in GvG, and buying more GE attempts to name a few. Eventually you will hit a point where medals aren’t terribly important anymore, so this is usually not the most exciting of rewards.
![]() Goods: This is going to indicate how many goods a user will receive upon collection. It’s going to work two ways: if you see this symbol after a building has been motivated then it means you’re going to receive an equal amount of all goods of the era of the building, so divide the total by 5 to know what that is (ie: The Pirate Ship gives +15 Goods on motivation, so divided by 5 that’s 3 of each good of the era matching the building); the other way will be in specific goods and you’ll know which ones because upon motivation the symbol will change to be of which good(s) you are receiving and the quantity of each.
Goods: This is going to indicate how many goods a user will receive upon collection. It’s going to work two ways: if you see this symbol after a building has been motivated then it means you’re going to receive an equal amount of all goods of the era of the building, so divide the total by 5 to know what that is (ie: The Pirate Ship gives +15 Goods on motivation, so divided by 5 that’s 3 of each good of the era matching the building); the other way will be in specific goods and you’ll know which ones because upon motivation the symbol will change to be of which good(s) you are receiving and the quantity of each. ![]() You can tell what era a building is in by hovering over it, and the era will be next to the name. If there is no named era then it will default to the current era you are in. The exciting thing about goods coming from a special building is they’ll always be refined goods. This can be a great way to get around the need to gather goods to use in the refining process, which is a huge resources and time savings.
You can tell what era a building is in by hovering over it, and the era will be next to the name. If there is no named era then it will default to the current era you are in. The exciting thing about goods coming from a special building is they’ll always be refined goods. This can be a great way to get around the need to gather goods to use in the refining process, which is a huge resources and time savings.
![]() Forge Points: This tells the user how many FPs they will receive upon collection, usually after a building has been motivated. These are the main driving force of the game, so they’re usually coveted. You want to make sure you’re getting decent FPs per square of space though, because space is limited and the most precious resource of the game overall. To know how many FPs you’re getting per square, multiply the size of the building (ie: so a 2×3 would be 6 squares) to know total squares, and then divide the number of FPs by that (so a Sacred Sky Watch that gives 1 FP in a 2×3 space would be 1/6 which is 0.167) to know how many FPs per square of space you’re getting. This way you can work to place the most efficient buildings (and this math works for any resource).
Forge Points: This tells the user how many FPs they will receive upon collection, usually after a building has been motivated. These are the main driving force of the game, so they’re usually coveted. You want to make sure you’re getting decent FPs per square of space though, because space is limited and the most precious resource of the game overall. To know how many FPs you’re getting per square, multiply the size of the building (ie: so a 2×3 would be 6 squares) to know total squares, and then divide the number of FPs by that (so a Sacred Sky Watch that gives 1 FP in a 2×3 space would be 1/6 which is 0.167) to know how many FPs per square of space you’re getting. This way you can work to place the most efficient buildings (and this math works for any resource).
![]() Happiness: This will indicate typically how much happiness the building will offer to your city. Happiness is needed to make your population enthusiastic (or to just keep them from being angry), and an enthusiastic rating gives bonuses to your city as a whole. In some instances though a building will take away happiness (like the Black Tower), and that means you lose some happiness to have it in your city. Be mindful of those buildings if you already have a happiness shortage.
Happiness: This will indicate typically how much happiness the building will offer to your city. Happiness is needed to make your population enthusiastic (or to just keep them from being angry), and an enthusiastic rating gives bonuses to your city as a whole. In some instances though a building will take away happiness (like the Black Tower), and that means you lose some happiness to have it in your city. Be mindful of those buildings if you already have a happiness shortage.
![]() Diamonds: In very rare instances a building might give you the opportunity to receive diamonds and actually state as much. At this time there is no building that guarantees you will get diamonds, but something like The Crow’s Nest gives you a specific percentage chance that on collection it will grant you some. These are really nice to receive because they’re the currency of the game that typically costs real money to acquire. Diamonds can also be found under the cost of planting premium buildings in your city, which means you must pay that amount to plant the building. It is not recommended to buy premium standard buildings (like a premium production building for your era) to plant in your city because they’re typically very expensive and you’re going to grow out of them with no way to save the building nor recover the diamonds you spent on it.
Diamonds: In very rare instances a building might give you the opportunity to receive diamonds and actually state as much. At this time there is no building that guarantees you will get diamonds, but something like The Crow’s Nest gives you a specific percentage chance that on collection it will grant you some. These are really nice to receive because they’re the currency of the game that typically costs real money to acquire. Diamonds can also be found under the cost of planting premium buildings in your city, which means you must pay that amount to plant the building. It is not recommended to buy premium standard buildings (like a premium production building for your era) to plant in your city because they’re typically very expensive and you’re going to grow out of them with no way to save the building nor recover the diamonds you spent on it.
![]() Treasury Goods: These goods upon collection will be donated to the Guild Treasury. Typically it will be an equal amount of all goods matching the era of the building, so you can follow the logic in how you receive goods as a player to know how your Guild Treasury will receive the goods on your collection of this building. It’s important to note that if you are not in a guild at the present moment you will not be able to collect a building with this as a bonus because the goods have no where to go. This is likely to affect the Statue of Honor, which upon collection gives items to both the user and the guild; but I have not confirmed this for sure (if you can confirm or deny 100% please let me know). It is absolutely the case in instances of buildings like the Hall of Fame, or Great Buildings like Observatory.
Treasury Goods: These goods upon collection will be donated to the Guild Treasury. Typically it will be an equal amount of all goods matching the era of the building, so you can follow the logic in how you receive goods as a player to know how your Guild Treasury will receive the goods on your collection of this building. It’s important to note that if you are not in a guild at the present moment you will not be able to collect a building with this as a bonus because the goods have no where to go. This is likely to affect the Statue of Honor, which upon collection gives items to both the user and the guild; but I have not confirmed this for sure (if you can confirm or deny 100% please let me know). It is absolutely the case in instances of buildings like the Hall of Fame, or Great Buildings like Observatory.
![]() Crowns: This will be a donation of Guild Power to the Guild upon collection, and not something you will tangibly see until 8pm server time when what’s known to GvG guilds as “calc” or “recalc” is run and all GP collected in the last 24hrs is applied to the guild level. Like treasury goods, if you are not presently in a guild you will be unable to collect this item. This is likely to affect special collections done in production buildings where you can choose to spend a certain amount of time to make GP (again not confirmed so please let me know if you have had experience with this), so be mindful of this if you’re working on an event quest line and you’re not presently in a guild.
Crowns: This will be a donation of Guild Power to the Guild upon collection, and not something you will tangibly see until 8pm server time when what’s known to GvG guilds as “calc” or “recalc” is run and all GP collected in the last 24hrs is applied to the guild level. Like treasury goods, if you are not presently in a guild you will be unable to collect this item. This is likely to affect special collections done in production buildings where you can choose to spend a certain amount of time to make GP (again not confirmed so please let me know if you have had experience with this), so be mindful of this if you’re working on an event quest line and you’re not presently in a guild.
![]() Random Reward: You’ll see this in a story quest sometimes, it is seen for all recurring quests (until they’re completed), and you see it on buildings like Wishing Wells, Fountain of Youths, and Hedge Mazes to name a few. This symbol means you have a percentage chance (all “known” probabilities are unconfirmed by Inno Games) to get either: Supplies, Coins, Goods, Medals, FPs, or Diamonds. Supplies and Coins are always the highest probability, Diamonds are always the lowest, and everything else falls somewhere in-between (with an equal probability for each of the five goods of the era). You won’t know until collection time what you will get.
Random Reward: You’ll see this in a story quest sometimes, it is seen for all recurring quests (until they’re completed), and you see it on buildings like Wishing Wells, Fountain of Youths, and Hedge Mazes to name a few. This symbol means you have a percentage chance (all “known” probabilities are unconfirmed by Inno Games) to get either: Supplies, Coins, Goods, Medals, FPs, or Diamonds. Supplies and Coins are always the highest probability, Diamonds are always the lowest, and everything else falls somewhere in-between (with an equal probability for each of the five goods of the era). You won’t know until collection time what you will get.
![]() Blue Prints: This is not common, but there are buildings (like the Shrine of Inspiration) that give you one or more blue prints towards Great Buildings upon collection. The GB you can receive them for is based off the era of the building. You will be able to receive BPs for any GBs that match the era of the building, or any eras below that name era. So for example if you have a Shrine of Inspiration that is in the High Middle Ages, then you can receive BPs for HMA, EMA, IA, and BA.
Blue Prints: This is not common, but there are buildings (like the Shrine of Inspiration) that give you one or more blue prints towards Great Buildings upon collection. The GB you can receive them for is based off the era of the building. You will be able to receive BPs for any GBs that match the era of the building, or any eras below that name era. So for example if you have a Shrine of Inspiration that is in the High Middle Ages, then you can receive BPs for HMA, EMA, IA, and BA.
![]() Attack Boost: This plain set of crossed swords indicates a percentage boost that will be given to the attack of your attacking army. You have two armies in your city: the one you’re attacking with and the one that is set up to defend your city. Each one has its own boost that consists of an attack bonus and a defense bonus to the units. This one affects the attack portion of the attacking units only.
Attack Boost: This plain set of crossed swords indicates a percentage boost that will be given to the attack of your attacking army. You have two armies in your city: the one you’re attacking with and the one that is set up to defend your city. Each one has its own boost that consists of an attack bonus and a defense bonus to the units. This one affects the attack portion of the attacking units only.
![]() Attack Boost: This blue set of crossed swords indicates a percentage boost that will be given to the attack of your defending army. You have two armies in your city: the one you’re attacking with and the one that is set up to defend your city. Each one has its own boost that consists of an attack bonus and a defense bonus to the units. This one affects the attack portion of the defending units only.
Attack Boost: This blue set of crossed swords indicates a percentage boost that will be given to the attack of your defending army. You have two armies in your city: the one you’re attacking with and the one that is set up to defend your city. Each one has its own boost that consists of an attack bonus and a defense bonus to the units. This one affects the attack portion of the defending units only.
![]() Defense Boost: This plain shield indicates a percentage boost that will be given to the defense of your defending army. You have two armies in your city: the one you’re attacking with and the one that is set up to defend your city. Each one has its own boost that consists of an attack bonus and a defense bonus to the units. This one affects the defense portion of the defending units only.
Defense Boost: This plain shield indicates a percentage boost that will be given to the defense of your defending army. You have two armies in your city: the one you’re attacking with and the one that is set up to defend your city. Each one has its own boost that consists of an attack bonus and a defense bonus to the units. This one affects the defense portion of the defending units only.
![]() Defense Boost: This red shield indicates a percentage boost that will be given to the defense of your attacking army. You have two armies in your city: the one you’re attacking with and the one that is set up to defend your city. Each one has its own boost that consists of an attack bonus and a defense bonus to the units. This one affects the defense portion of the attacking units only.
Defense Boost: This red shield indicates a percentage boost that will be given to the defense of your attacking army. You have two armies in your city: the one you’re attacking with and the one that is set up to defend your city. Each one has its own boost that consists of an attack bonus and a defense bonus to the units. This one affects the defense portion of the attacking units only.
![]() Population: This is going to tell you, based on where it’s located, if it’s costing you population to plant the building or giving you population to plant the building. You can tell if it’s a cost or not based on where it’s located in the menu: when it’s located under the era name it’s what you will gain (such as with a Tribal Square), and when it’s under the area that states “Costs” it’s how much population you must have available to plant the particular building (such as with a Terrace Farm, or any building you want to plant in the construction menu that isn’t a house). Be careful with adding population to your city that you don’t unbalance the happiness of your citizens.
Population: This is going to tell you, based on where it’s located, if it’s costing you population to plant the building or giving you population to plant the building. You can tell if it’s a cost or not based on where it’s located in the menu: when it’s located under the era name it’s what you will gain (such as with a Tribal Square), and when it’s under the area that states “Costs” it’s how much population you must have available to plant the particular building (such as with a Terrace Farm, or any building you want to plant in the construction menu that isn’t a house). Be careful with adding population to your city that you don’t unbalance the happiness of your citizens.
![]() Hourglass: The hourglass indicates the era of the building in question prior to planting it in your city. There will always be text next to it to tell you what the era is (if one is specified, otherwise it will say “No Era”).
Hourglass: The hourglass indicates the era of the building in question prior to planting it in your city. There will always be text next to it to tell you what the era is (if one is specified, otherwise it will say “No Era”).
![]() Road: This indicates that a road connection is necessary for this building to produce items (the only exceptions are population once it is built, and troops that Alcatraz will spawn). The text next to the symbol will tell you if it needs a two-lane road or not. Note that buildings requiring a two-lane road must be built on a two-lane road, whereas buildings that only require a single-lane road can be built on either a single-lane or a two-lane road. There are some buildings that will indicate no road connection is necessary (like most decorations) which is nice.
Road: This indicates that a road connection is necessary for this building to produce items (the only exceptions are population once it is built, and troops that Alcatraz will spawn). The text next to the symbol will tell you if it needs a two-lane road or not. Note that buildings requiring a two-lane road must be built on a two-lane road, whereas buildings that only require a single-lane road can be built on either a single-lane or a two-lane road. There are some buildings that will indicate no road connection is necessary (like most decorations) which is nice.
![]() Space: The grid-line indicates how much space a building requires. It always goes width first, then height. Since the game is kind of on a diagonal though it can be hard to picture, but there is a bit of a left-to-right action for the width and a top-to-bottom action for the height. As you place buildings in your city you’ll start to get the hang of it, promise.
Space: The grid-line indicates how much space a building requires. It always goes width first, then height. Since the game is kind of on a diagonal though it can be hard to picture, but there is a bit of a left-to-right action for the width and a top-to-bottom action for the height. As you place buildings in your city you’ll start to get the hang of it, promise.
![]() Hourglass: An hourglass will tell you how long it will take for a building to become functional in your city. This is the build time. Special event items and similar, like decorations, build in seconds. Other things, like houses or supply buildings, could take upwards of half a day depending on the era they’re from. The time you see will have your guild level bonuses reflected in it.
Hourglass: An hourglass will tell you how long it will take for a building to become functional in your city. This is the build time. Special event items and similar, like decorations, build in seconds. Other things, like houses or supply buildings, could take upwards of half a day depending on the era they’re from. The time you see will have your guild level bonuses reflected in it.
 Items that Need Motivation: Anything listed here that mentions it might need motivation to be produced is talking about whether or not that building requires aid, and the building itself will tell you if aid is needed by stating “when motivated” above the affected items (this notification disappears upon motivation). In some cases, mainly for standard buildings, aid will simply double what the production affect is. So for a house, as an example, you’ll get twice as many coins when it’s motivated than when it’s not. For something like a Shrine of Knowledge however, the building not being aided means you don’t get your FP. Now apply that to event buildings that give a whole swath of goodies but need aid for that to happen, and aid becomes a very prominent thing. Keeping an active, aid-happy Friends List and being in a guild that promotes aiding its members frequently will be very important as your city grows and you have more and more of these buildings that need aid. Reducing the number of buildings that just suck up aid is also advisable. Otherwise you might have to use a self-aid kit to get the promised goodies (and those can run out).
 Costs to Build: All costs to build are under their own small part of the menu, which you can see when you hover (clicking once I believe on mobile mimics the hover on a computer) over a building you’re looking to plant. The costs will vary from building to building, and some cost more than others while many event buildings only cost you population (if that). If you don’t have enough of something to plant the building it will be indicated in red in that area, and the amount you see in red is the total amount of whatever it’s specifying that you’ll need, not your deficit.
See a symbol in-game that isn’t shown here, and you’re not sure what it means? Drop it in the comments and I’ll do what I can to respond, and if necessary update this list. In the case of a Great Building giving a supply boost (percentage boost) the number of collections during which it’s active will likely be limited, and indicated in the flavor text.

It took me a while to find you r guide, and I found it useful. However, there are some icons missing from your list. For example, there is an icon in the Winter bakery, final upgrade. The icon is associated with the bonuses “provided”, specifically with a 1x and 2x bonus. It is a circle with yellow, brown, green and red in it. Because it is small, it is hard to make out what the icon is supposed to represent.
There are also some icons associated with the military units, such as boots, >>, and several others. If these were defined too it would be helpful. Especially for those of us who are fairly new to the game.
Thank you for the work you have already done.
I am glad you found the guide useful. 🙂
That symbol you speak of with the Winter Bakery is just the icon associated with that set. Each set has its own unique marker. If you hover over any other set you’ll see different markers in those spots.
I had never considered adding the military unit icons in here originally, but I certainly could. I’ll add it to the list I have of things to tweak.
There’s seems to be a symbol over my goat farms that looks like an empty box and masked man. It seems my supply is being stolen
How do I stop that?
Ah, that must be the symbol on mobile to state you’ve been plundered. There are a few things you can do, but there’s no surefire way to stop it except by collecting on time, every time. Some of the other methods include: sending a friend request (and it being accepted), aiding the individual responsible, asking politely that they stop (if you get upset it usually just fuels the fire of a plunderer), build and level Galata Tower, attack them back and steal their stuff in return. I go into detail about it in this article about plundering if you want to read more.
I see an icon of a rolled up scroll tied with a red tie. It shows up when I got to Guild Expedition. It says I have 3 chances of whatever it means.
Are you playing in browser, and if so are you using the FOE Helper add-on? I only ask because presently that’s the single place I see the icon in question, but there are no tool-tips with this add-on to tell me what it’s for (and said add-on is not an official FoE item). This means it’s either something unique to the add-on, or it’s a feature as-of-yet to be announced in FoE that the add-on has managed to find in the coding. If I had to make an educated guess, you likely have a quest that wants you to successfully complete three encounters in GE (possibly with other specifics conditions to meet).
Thank you for your prompt reply. The symbol in question also appears on the GBG screen as well. And yes it is a foehelper symbol.
Found out it has to do with the boost the CF gives you.
Ah, yeah, I don’t cover the FOE Helper symbols on here, since they’re not technically part of the game. 🙂 I’m surprised it has to do with CF though, since CF has to do with quest rewards only. Huh.
What about the GB icon that sits over other buildings that aren’t GB? I don’t really understand what that’s trying to tell me
This is not an icon I am familiar with, are you mobile or browser based? And where/when do you see this?
Sorry, it was an icon that was sitting over another building behind the one I was looking at! I do have another icon though that I would like explained. The wreath. It may have something to do with rank maybe? I see it in the upper left-hand corner in the browser version which you can click to access the global rankings, I think. But then when I looked up the Timeless Dojo on this website (https://en.wiki.forgeofempires.com/index.php?title=Timeless_Dojo_-_Lv._2), the page says the Timeless Dojo provides “The Wreath” icon and then has a list of numbers according to each era.
I believe that the image you see on that site is in error, as the Timeless Dojo provides that amount of coins. As for the laurels, or a wreath as you call it, those indicate guild prestige. They’re usually found surrounding the guild prestige amounts when you look at the guild rankings list, with the top three having bronze, silver, and gold. 🙂
I’m slightly confused regarding the fighting … to summarise, your guide says …
Plain set of crossed swords : Boost to the attack of your attacking army.
Blue set of crossed swords : Boost to the attack of your defending army.
Plain shield : Boost to the defense of your defending army.
Red shield : Boost to the defense of your attacking army.
… but I have others !
I have a Blue Shield and a set of Red Crossed Swords … what do these mean please ?!?
Hi Gary, sorry for the delay in responding I’ve been very busy with work. I need to update this particular post as Inno has updated their symbols fairly recently. The red swords have replaced the plain swords, and the blue shield has replaced the plain shield. So anything blue is indicative of it being for your defense army, and anything red is for your attacking army.