At the inception of this site we released an article on what GBs were right for you. This really wasn’t a comprehensive list of all the GBs in the game though, nor did it truly discuss which play style(s) they work best for. So this article is going to amend that. The original one is still good for the absolute basics of planning, but this one will be what really gets into the nitty-gritty. You’re welcome to read the entire article and really learn about all the GBs in the game, or you can skip around to the ones that interest you and/or match the play style you’ve decided is what you most closely align with.
Determine Your Play Style
Before anything else, figure out what your play style is. This usually falls under one of a few of categories (or a combo of sorts):
- Goods-Based GE/GvG Goods Farmer/Negotiator
- This play style will focus mainly on using goods to get by wherever possible. You probably negotiate most, if not all of GE; you farm goods for the treasury to help with GvG if you’re in that style of guild; and you might negotiate to gain sectors on the continent map. In essence, you hardly ever fight. Someday, you might even have enough of a goods empire amassed to be a seller of goods.
- Fighting-Based GE/GvG Fighter/Fighter
- This play style will focus mainly on brute strength to get by wherever possible. You probably fight most, if not all of GE; if your guild participates in GvG you like to tear up the maps fighting; and it would be unthinkable of you to negotiate the continent map. You might even be your neighborhood’s worst nightmare. In essence, the only thing you need goods for is the tech tree and certain quests. You rarely use them elsewhere, except to maybe trade with guild mates to help them out.
- Fighting-Based GE/GvG DA Farmer
- This play style is one that enjoys fighting, but maybe not as much as the previous style. You like to fight as much of GE as possible, if not all of it; and you might even fight a lot of the continent map. Occasionally, you might ransack your neighborhood, but it’s not as common for you. If your guild does GvG, you’re likely to help by planting DAs because you’re not as keen to fight on the maps (or you’re mobile based and it’s too difficult to fight with your device). Troops and attack are important to you, but you’re not adverse to using goods here and there to help yourself along.
- Balanced (with a subtle preference to goods or fighting)
- Likely the most difficult play style to achieve, a balanced player strives to use troops and goods equally. If this is you, you’re likely a jack-of-all-trades, master of none. This is a-okay in this game, because it means you’re far more self-sufficient usually than any other player. Despite that, you’re going to have a preference to either goods or fighting, however slight it might be. You want the troops to be able to fight as you please, and you also want the goods to toss around as you want and/or need.
Knowing how you play helps you decide what GBs you’re going to get the most benefit from. These are of course just the basics, your individual style is going to have nuances that just cannot be accounted for here. As an example, a fighter might not just like to fight GE and/or GvG, but they may be an avid head-hunter in their hood too who may or may not plunder folks. Not all fighters attack their neighborhood and plunder, but some do. Likewise, someone who farms goods may actually plunder their hood as a way to get more goods! It’s kind of like DnD alignments here. You are a Fighter, but where do you fall in the nine-alignment chart? Chaotic Evil? Lawful Good? It will make a difference, so just keep that idea in the back of your mind moving forward.
Reference Chart of GBs
Below is a quick table that references all the GBs released in the game to date (or as to-date as the last edit on this article anyways). This is a fast reference for those who perhaps don’t have time to read, or don’t need to read, or don’t want to. Whichever it is, here are your cliff-notes. These are of course all just suggestions. You may feel that something which is suggested as beneficial (even temporarily) to your play style won’t actually benefit your/fit into your style and that’s fine. You don’t have to agree with everything here, this is just meant to be a handy reference; especially for those who have no idea and need the extra help.
Quick note first on the columns:
- GBs are listed with era (and era number for sorting) first, then their bonuses/what they do, and then with markings for who should build them.
- The above styles are simplified into if you mainly fight, farm/use goods/negotiate, or are a balanced player.
- If it says personal choice then this is a GB that you don’t need but might want and the choice is yours. Sometimes they’re very debated.
- The ones listed as don’t keep are GBs you’re likely to use as a stepping stone, so don’t invest too much into them because it’s very likely you’ll be destroying them eventually.
- Lastly, the ones that say don’t build are because 90% of folks will tell you they’re absolutely pointless and a waste of resources. That doesn’t mean you can’t, just know that at the end of the day you could use that space for better stuff.
| Era # | Era | Great Building | Primary Bonus | Secondary Bonus | Fighter | Farmer/ Negotiator | Balanced | Personal Choice | Don't Keep | Don't Build |
|---|---|---|---|---|---|---|---|---|---|---|
| 00 | N/A | Galata Tower | Plunder Repel | Goods/Unrefined Goods | X | |||||
| 00 | N/A | Observatory | Treasury Goods | Support Pool | X | X | X | |||
| 00 | N/A | Oracle of Delphi | Supplies | Happiness | X | |||||
| 00 | N/A | Temple of Relics | Relic Reward in GE | --- | X | X | X | |||
| 01 | BA | Statue of Zeus | Bonus to Atk/Def when Attacking | --- | X | X | X | |||
| 01 | BA | Tower of Babel | Goods/Unrefined Goods | Population | X | |||||
| 02 | IA | Colosseum | Medals | Happiness | X | |||||
| 02 | IA | Lighthouse of Alexandria | Supply Boost | Goods/Unrefined Goods | X | X | X | |||
| 03 | EMA | Cathedral of Aachen | Bonus to Atk/Def when Attacking | Coins | X | X | X | |||
| 03 | EMA | Hagia Sophia | FPs | Happiness | X | |||||
| 04 | HMA | Notre Dame | Supplies | Happiness | X | |||||
| 04 | HMA | St. Mark's Basilica | Coin Boost | Goods/Unrefined Goods | X | X | X | |||
| 05 | LMA | Castle del Monte | Bonus to Atk/Def when Attacking | FPs | X | X | X | |||
| 05 | LMA | St. Basil's Cathedral | Fierce Resistance/ Support Pool | Coins | X | |||||
| 06 | CA | Deal Castle | Fierce Resistance/ Support Pool | Medals | X | |||||
| 06 | CA | Frauenkirche of Dresden | Goods/Unrefined Goods | Happiness | X | X | ||||
| 07 | IE | Capitol | Population | Supplies | X | |||||
| 07 | IE | Royal Albert Hall | Supply Boost | Goods/Unrefined Goods | X | X | X | |||
| 08 | PE | Alcatraz | Troops | Happiness | X | X | ||||
| 08 | PE | Château Frontenac | Quest Reward Boost | Coins | X | X | X | |||
| 09 | ME | Atomium | Treasury Goods | Happiness | X | |||||
| 09 | ME | Space Needle | Coins | Happiness | X | |||||
| 10 | PME | Cape Canaveral | FPs | --- | X | X | X | |||
| 10 | PME | Habitat | Population | Coins | X | |||||
| 11 | CE | Innovation Tower | Population | FPs | X | X | X | |||
| 11 | CE | Lotus Temple | Coins | Happiness | X | |||||
| 12 | TE | Truce Tower | Bonus Goods when Aiding | Supplies | X | X | ||||
| 12 | TE | Voyager V1 | Supplies | Chance of Bonus Goods upon Plunder | X | |||||
| 13 | FE | Arc | Treasury Goods | GB Rewards Boost | X | X | X | |||
| 13 | FE | Rain Forest Project | Goods/Unrefined Goods | Blueprint Boost | X | X | ||||
| 14 | AF | Arctic Orangery | FPs | Critical Hit Bonus | X | X | X | |||
| 14 | AF | Gaea Statue | Medals | Happiness | X | |||||
| 14 | AF | Seed Vault | Chance of Resource upon Aiding | Supplies | X | |||||
| 15 | OF | Atlantis Museum | Goods/Unrefined Goods | Chance of Double Plunder | X | |||||
| 15 | OF | Blue Galaxy | Medals | Chance of Double Collection | X | |||||
| 15 | OF | Kraken | FPs | First Strike | X | X | ||||
| 16 | VF | Himeji Castle | Supplies | Chance of Resouce upon Battle Won | X | X | ||||
| 16 | VF | Terracotta Army | Advanced Tactics | --- | X | X | X | |||
| 17 | SAM | The Virgo Project | Missile Launch | Coins | X | |||||
| 17 | SAM | Star Gazer | Previous Era Goods | --- | X | X | ||||
| 18 | SAAB | Space Carrier | Special Goods/Medals | Chance of Resource upon Successful Negotiation | X | X |
Details on Each GB
The following are all GBs, listed alphabetically, with a brief synopsis about what it does and therefore why you may or may not want to plant it. Please use the list with jump codes to quickly go to a specific GB as needed. Clicking on “Back to Top” below any of them will bring you to this area and not the top of the page.
Alcatraz | Arc | Arctic Orangery | Atlantis Museum | Atomium | Blue Galaxy | Cape Canaveral | Capitol | Castle del Monte | Cathedral of Aachen | Château Frontenac | Colosseum | Deal Castle | Frauenkirche of Dresden | Gaea Statue | Galata Tower | Habitat | Hagia Sophia | Himeji Castle | Innovation Tower | Kraken | Lighthouse of Alexandria | Lotus Temple | Notre Dame | Observatory | Oracle of Delphi | Rain Forest Project | Royal Albert Hall | St. Basil’s Cathedral | St. Mark’s Basilica | Seed Vault | Space Carrier | Space Needle | Star Gazer | Statue of Zeus | Temple of Relics | Terracotta Army | Tower of Babel | The Virgo Project | Truce Tower | Voyager V1
Last Updated: January 29, 2021
Last GB Released Based on Above: Galata Tower
Anything beyond the two criteria listed above will not be listed below yet. Please wait for an update for this information.
Alcatraz
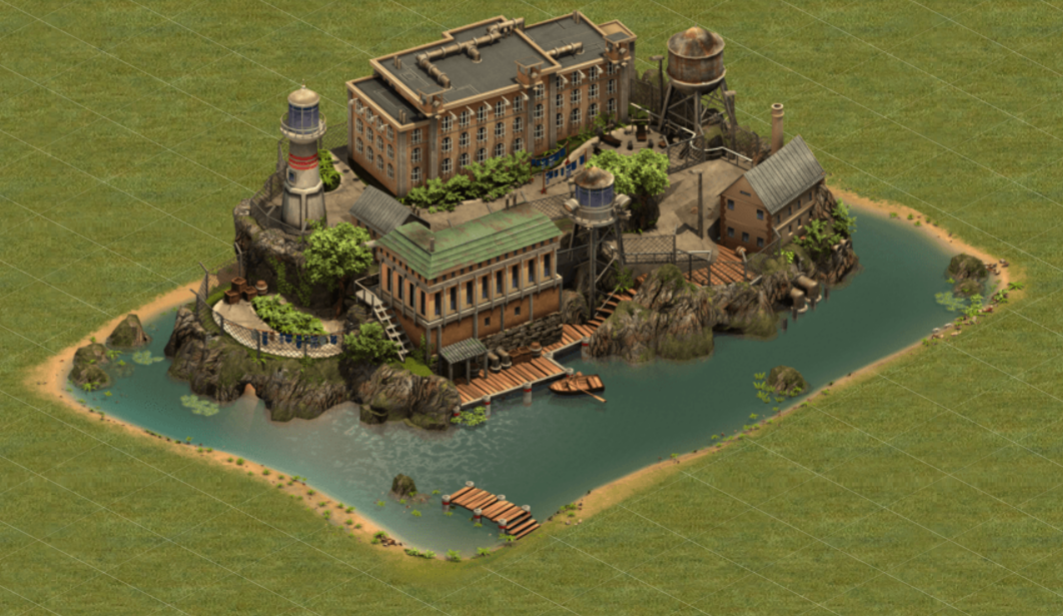
 Alcatraz is something you want if you do any fighting at all in earnest because of its bonus that gives you troops. This GB will produce troops of any barracks that are currently in your city, regardless of if they are fully constructed or connected to a road. The number of troops produced is based on the level of the GB. It will always be a random quantity based on all the barracks in your city, but it is percentage-based (so if you have five rogue hideouts, two jaegers, and three howitzers built and Traz is producing 10 troops a collection, you will get 5 rogues, 2 jagers, and 3 howitzers every collection). It should also be noted that Traz will benefit from any recruitment bonus your guild level currently enjoys. So if you have a reduction in recruitment time of 2 hours, Traz will produce troops ever 22 hours instead of every 24. As an extra bonus, this GB offers happiness, and since it’s one that a fighter is definitely going to want to take well beyond level 10, you’ll almost never have a happiness problem again.
Arc
 The Arc is, without a doubt, the most powerful GB in the game because of its bonus. On the outside this GB looks like it’s good for the guild, and it is since it does donate a lot of goods to the treasury. The reality though is that this GB is good for the user in that any rewards you get for placing in the top 5 of another GB gets multiplied by a percentage bonus. Of all the GBs, this is definitely the one that gets pushed well past level 10. It’s the GB that lets you bank a lot of FPs, get BPs faster, and just generally start to move your city progress much faster. Used maliciously, it’s a tool to snipe other GBs and get more for yourself than you give. Used kindly it’s a great tool to help build up your guild mates and friends. So make no mistake, this GB will help the user more than the guild unless you choose to use all its bonuses to help your guild. It really changed the way FoE is played, and it’s debated if that was for the better or for the worse. You’ll have to decide for yourself which that is, but regardless you will want this GB no matter what your play style is lest you get left behind. It’s your choice as to when you get this one though.
Arctic Orangery
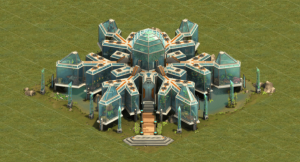 While this GB is most effective for fighters, it is absolutely of benefit to all players because it affects not just the units you’re using for attacking, but also your home defense with its chance for a critical hit. The limit to the critical hit bonus though is that it will only occur if you’re attacking a unit from the same era as what you’re attacking with. That’s usually not an issue though, unless you’re trying to fight ahead on the continent map and then you may wish it’d kick in. Aside from the critical hit chance, this GB gives FPs which are always a good thing. While expensive to take up, it’s often one that you will want to push past level 10 if you’re a fighter. Those who aren’t fighters may find other GBs to take priority and not worry about AO as much.
Atlantis Museum
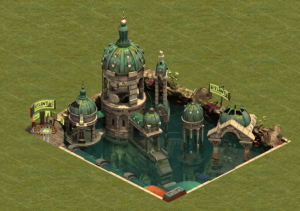 This GB is one that isn’t really useful unless you do a lot of plundering. While it does give goods (unrefined from ME and beyond), it takes up a decent chunk of space and there are a lot of other GBs that will make goods without having to add in Atlantis (or AM). To the avid plunderer though, this could be a gold mine because it offers the opportunity to double whatever it is you plunder. It is percentage based, but it has no set number of uses a day making it pretty awesome in that aspect. At 6×7 though this is a GB that you should only build if you’re going to benefit from both of the bonuses, so if you aren’t a player that plunders others regularly then it isn’t something to build.
Atomium
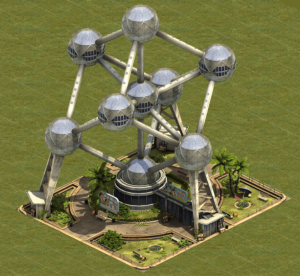 This GB is one that donates to the guild treasury, making it somewhat-selfless to build. Of those that donate to the treasury though, this is the worst of them to build. It is a large footprint, donates a moderate amount of goods to the treasury, and gives happiness. In the grand scheme this isn’t a bad GB to have as a stepping stone, but once you put in Arc and some other GBs that offer happiness and bonuses that better suit your city, this will be a GB you’ll want to remove. Arc will provide far more goods to the treasury than anything else, and there are other GBs that give happiness that will do better for you. So build this one knowing that you’re likely to tear it down eventually, and don’t invest too much into it. If you don’t need the happiness, then this is a GB you wouldn’t even need to bother building at all. Save yourself the goods and the FP investment that it would take to plant, especially because ME goods aren’t always easy to procure than those that don’t need to be refined.
Blue Galaxy
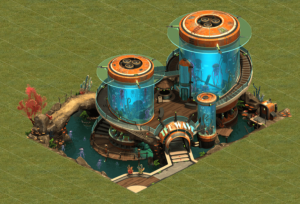 There was a lot of hype surrounding this GB when it first came out, and unfortunately it didn’t really live up to the hype for the most part. This GB offers medals, and the chance to double the collection of the buildings in your city a certain number of times a day. In addition it is a large footprint, and expensive to level. Once you take Arc up your supply of medals will be taken care of, so then it’s a big question on if the chance for double payout is worth it. Some will say yes, some will say no, making this a GB that is up to you on whether or not it’s worth building. A lot of it will depend on if you have the space to spare for it. If it’s a GB you really want, then you’re likely to be able to find/make space for it without compromising your ability to play the game effectively. Higher level players who struggle to get enough aid to maximize the output of their city are considering this a good GB that can help offset that loss, so that’s some food for thought. Just know that to make it effective, you have to be ready and in a position to take it well beyond the base 10 levels; the payout won’t really be there until you do.
Cape Canaveral
 The only thing that this GB creates are FPs, but it is worth every good you invest into it to build, and every FP that you spend to take it up another level. With a relatively small footprint, it is a very efficient FP producer even at level 10. Most choose to take it well beyond that because the return on investment is well worth it. This is a GB that it doesn’t matter what your play style is, you’re going to get a lot of use out of it. Space is at an absolute premium in this game, and FPs are the currency that buys you a stronger city by enhancing your GBs; so Cape fills in for both of those needs quite nicely. Not to mention GBs do not need to be motivated/polished to produce, so these are guaranteed FPs unlike a Shrine of Knowledge or Sacred Sky Watch, which won’t produce that lovely income if they haven’t been aided by a friend, neighbor, or guild mate. For reference, Cape is smaller than a Terrace Farm, and at level 10 it will give you double the number of FPs that a TF will, and it cannot be plundered (which a TF can). That’s how good of a FP producer this GB is. In fact, if you are out of space, it’d be worth replacing a TF with Cape.
Capitol
 A lot of players get very excited when they’re able to put in Capitol, because it’s the first population GB that really makes a difference in the number of houses one needs in their city. Don’t get too excited though, because Capitol is a GB that does not stand up to the test of time. It produces population and supplies, and while supplies are desirable, not at the ratio that Capitol offers them. It will be very expensive to make Capitol give enough population to remove all your houses forever, which other population GBs can do. Not needing houses will clear up a lot of space for other needed items to facilitate a city that functions smoothly in higher eras; which means Capitol is a good stepping stone until you can get a better GB, but it’s certainly not a keeper. Not even for the supplies, you will be able to get plenty of them from other sources.
Castle del Monte
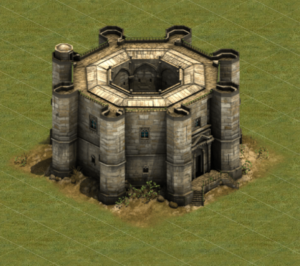 Castle del Monte is one of the three GBs referred to when a player mentions the fighting trifecta (the other two are Cathedral of Aachen and Statue of Zeus). These three GBs are basic for any play style because of the fact that they assist with fighting and are not expensive to acquire. Even if you are a player that deals with goods most of the time and doesn’t fight, there are situations in which a quest or activity demands that you do fight. At that time these GBs, at least to level 10, will assist you. For a primary bonus they offer additional attack and defense bonuses to the units you are using to attack with (so not your home defense), and that can make a huge difference even early on in their levels! CdM is awesome in that its secondary bonus is FPs. At level 10 you will also get 6 FPs a day from CdM, which is not bad at all for its size. If you’re not a fighter you may choose to take it beyond level 10 just for some additional FPs, but likely you’ll have other priorities. Fighters will want to take this one up sooner though, because the attack bonus will be important to them. Cheap to build, easy to level; what’s not to like about this little GB? (the answer is nothing)
Cathedral of Aachen
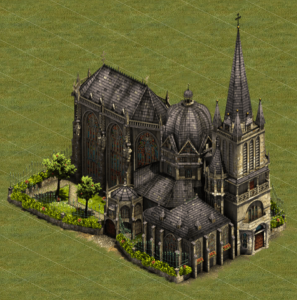 Cathedral of Aachen is one of the three GBs referred to when a player mentions the fighting trifecta (the other two are Castel del Monte and Statue of Zeus). These three GBs are basic for any play style because of the fact that they assist with fighting and are not expensive to acquire. Even if you are a player that deals with goods most of the time and doesn’t fight, there are situations in which a quest or activity demands to that do fight. At that time these GBs, at least to level 10, will assist you. For a primary bonus they offer additional attack and defense bonuses to the units you are using to attack with (so not your home defense), and that can make a huge difference even early on in their levels! CoA is the largest of the three, but it’s equally valuable in that it’s easy to get and cheap to take up. It has a secondary bonus of offering coins, which are a bit easier to acquire than any other resource in the game, but still very necessary to advance in the game and do most things. If you mainly work with goods, then this is not likely to be a GB on your radar to push past level 10, but for a fighter you’re going to want to raise this one up decently (it just might not be the first one you work on).
Château Frontenac
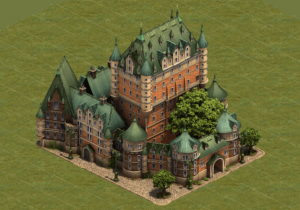 This GB is sometimes overlooked as not being the useful tool that it is. For anyone who likes to quest (which should be everyone considering the story quest), this is a good GB to have. It gives the player a bonus to the resources they receive from a quest payout (if they are coins, supplies, goods, medals, or diamonds). This can be a game changer if you’re looking to earn a lot of your resources from quests, or if you don’t want to spend real money on the game but like what diamonds can do for you. Raising up CF just for the diamonds you get from quests here and there is reason enough why everyone ought to build this GB. Diamonds might be a rare quest reward, but that’s all the more reason to maximize how many of them you get. Aside from the lovely boost to quest rewards, CF will provide you daily with coins.
Colosseum
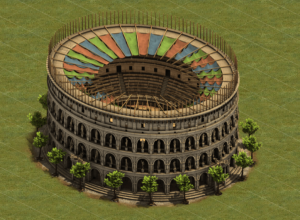 This is among the GBs that are recommended to never, ever be built for the fact that they’re useless even as a stepping stone. You may also notice that most of them offer the same two rewards too, medals and happiness. Colosseum is one of these GBs. The reason why it’s recommended to not build is for a few reasons: it’s rather large, you don’t really get a good enough return from any GB on medals to make it worthwhile for that reason, and as far as happiness goes it not only does it not stand up to the test of time, but it also doesn’t give enough to make that big of an impact early on for the amount of space it’s going to take up (and if you think your city is full from event items and such, remember when you had barely any expansions to work with… yikes). So this is a GB that it’s best to just admire from the BPs in your inventory, of which FoE will make sure you have plenty of.
Deal Castle
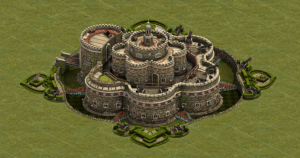 This is a GB that is absolutely personal choice, but most choose to either never build it, or delete it later on. It has a large footprint, and it’s not very efficient at what it does even if you take it beyond level 10. Deal is a GB that offers medals (and not a lot at that), and a bonus called “Fierce Resistance”. Fierce resistance is a boost to your home defense army’s attack and defense power (it doesn’t help the units you’re using to attack with at all), and a donation to the guild’s support pool (support pool is how GvG sectors get defense bonuses when held by your guild). Even as something that offers support pool, it’s usually not recommended. Deal is actually less efficient with space at level 10 then if you filled that same area with basic watchfires, so definitely think twice before planting it.
Frauenkirche of Dresden
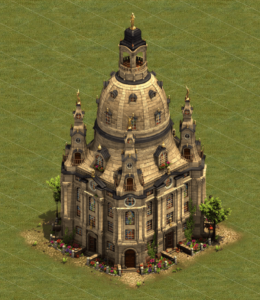 If you focus entirely on goods for your play style (farmer), then this GB is going to be a must-have. As a balanced player it’s not a bad GB to have, but if there were one that you could pass on this is likely it. For a fighter this GB really isn’t all that necessary. FoD offers the player goods (unrefined from ME and beyond) and happiness. As a farmer those goods will definitely be of benefit to you, and it might be the case for a balanced player as well depending on how you’re running your city. Goods farmers may also need the happiness if you do so little fighting that Alcatraz is of no use to you. A fighter that has Alcatraz (and especially one that plunders for goods) is not going to have much, if any, use for FoD. So in an effort to save yourself some space, this is a GB you can put on your list of “don’t need” if you’re a fighter. The nice thing about FoD is that it doesn’t have a large footprint, so it can fit into a city well. Regardless, if you don’t need it, save the space for something else. You might not need that space right now, but eventually something will come along that you want to fill it in with. FoE runs enough events with interesting buildings that you will find something to put there eventually. Or, if you’re a fighter, that space likely will go towards barracks for fighting.
Gaea Statue
 This is among the GBs that are recommended to never, ever be built for the fact that they’re useless even as a stepping stone. You may also notice that most of them offer the same two rewards too, medals and happiness. Gaea is one of these GBs. The reason why it’s recommended to not build is for a couple reasons: you don’t really get a good enough return from any GB on medals to make it worthwhile, and as far as happiness it really doesn’t give enough to make that big of an impact compared to other GBs you will build or have already built. So this is a GB that it’s best to just admire from the BPs in your inventory, of which FoE will eventually make sure you have plenty of.
Galata Tower
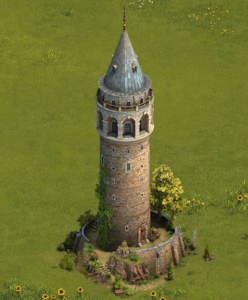 Like OoD, this is a GB that you receive as a new player from a quest line for BPs. It costs nothing to plant, and can actually have some prolonged use. By and large it is a GB that is going to be more attractive to someone to heavily negotiates than it is to someone who fights because of its bonus of goods (unrefined from ME and beyond). Its primary bonus though, plunder repel, is one that does hold some attraction for many players. This GB is the first of its kind to offer resistance to being plundered. It is not a guarantee, but for a certain number of plunder attempts a day (or collection, if you’re not a daily player), there is a percentage chance that your would-be plunderer will fail. Getting GT well-leveled could be huge for players who seem to find themselves on the losing-end of the plunder deal more often than not. In addition this is a very small GB so it isn’t going to cost a lot of real estate in your city, which is important since space comes at a premium in FOE and is your most valuable resource. Since it is a no-age building, you will also find it very inexpensive to level. Overall it’s an extremely good GB for a new player to have to get going with goods, and wouldn’t be a bad choice for any player–especially negotiators–to choose to keep in their city. Since it isn’t the strongest goods building though, this one is definitely a personal choice and not considered a must-have.
Habitat
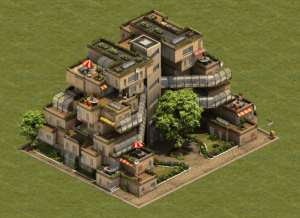 Up until you go beyond level 10, Habitat offers the best population-to-space ratio in the game. Beyond level 10 it can’t hold its weight against Innovation Tower, so when building this GB that should be kept in mind. Some will choose to keep both Habitat and Inno, but just as many (if not more) will opt to take the space that Habitat occupied and use it for something else. Especially since Tribal Squares give population too, making it very easy for Inno to handle the rest of the population needs by itself once it goes beyond level 10. It will depend entirely on how you play the game and what your needs are to determine if Habitat is just a stepping stone, or if it’s a GB that you keep around for the long haul. In addition to a really nice population boost, Habitat offers the player a daily bonus of coins.
Hagia Sophia
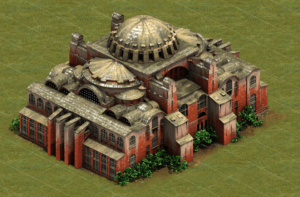 Hagia Sophia is the first GB (based on era of the GB) a player is able to build which gives FPs as a bonus upon collection. Its secondary bonus is happiness, which in the early going since it does give FPs can be a nice boost to a young player making it a good stepping stone as a GB. Many players choose to remove Hagia later on, but there are those who choose to keep it around and push it beyond level 10. If you do not intend to take Hagia beyond level 10, then you should be prepared to remove it at some point in favor of buildings that are more useful to your city. It’s still a big debate among some players if it’s worth taking beyond level 10. There are definitely better FP producers in the game, but depending on your city and play style Hagia might still be of used to you. This is definitely personal preference.
Himeji Castle
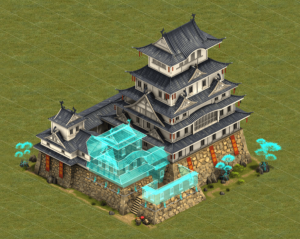 If you do not fight regularly, or hardly at all, then Himeji Castle is not a GB for you. For everyone else this GB is worth its size and cost. Since Himeji is a Virtual Future GB, it is very, very expensive to take even to level 10, beyond level 10 is brutal. So if you don’t really have a use for it, it’s probably better to pass on it and invest your FPs in something that will help you more. The main bonus of Himeji, called “Spoils of War”, is to offer a chance at a random reward upon winning a battle a certain number of times a day. The spoils of war can be really awesome too, at hundreds of goods, troops, FPs (some have gotten 200 FPs as a prize), and more! Unfortunately, because it is only a chance, and it’s limited to how many times you get that chance, this usually comes in waves. So you’ll get a bunch of prizes for a bit, and then go through a dry spell for a while. In addition to the spoils of war, Himeji offers supplies as a secondary bonus in a hefty amount (but not enough to make it worth building if you don’t fight).
Innovation Tower
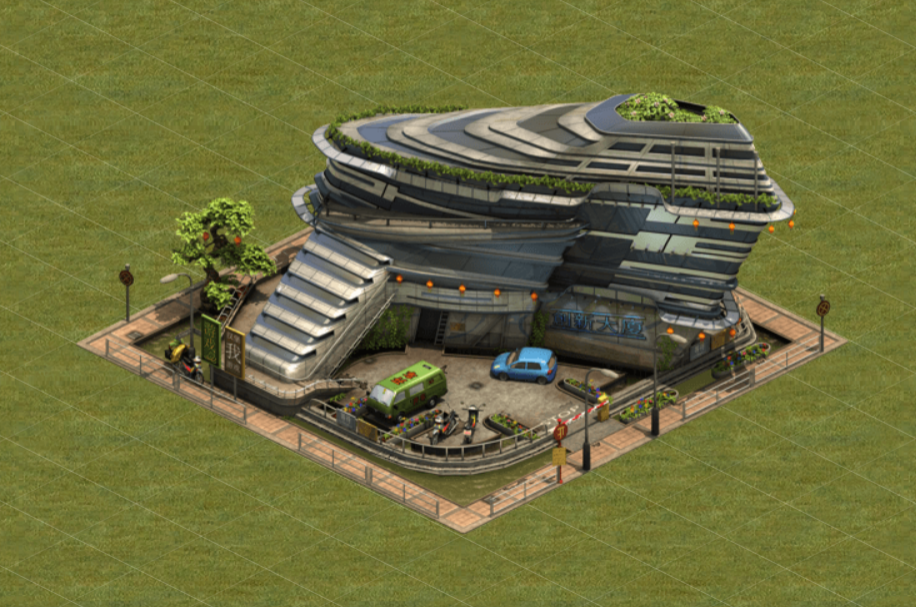
 While Inno cannot compete with Habitat as far as population-to-space ratio up to level 10, it boasts a (marginally) smaller footprint and FPs as its secondary bonus. As far as population GBs go, this one is a keeper for any player. The higher your era the more population you need, and the bigger the houses get (TE excluded) along with the need to use two-lane roads. Houses take up enough space that it is in any players best interest to get rid of them ASAP for better stuff, you’ll get plenty of coins elsewhere. Innovation Tower is the best way to do this, and it is a GB you’re going to want to push past level 10. Thankfully, despite being relatively high era, it’s also pretty easy to take beyond level 10. Getting FPs on top of population is a nice little extra, because the population bonus alone is reason enough to build this.
Kraken
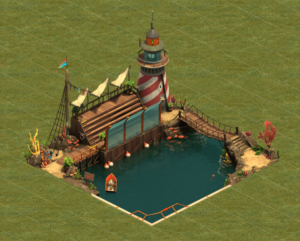 This may be a fan-favorite simply because who doesn’t love a good Kraken story? Despite the awesome and awe-inspiring fun of the tales behind the Kraken, this GB isn’t one that everyone needs to build. It has a small footprint and does offer FPs, but in the grand scheme of things it is expensive to push beyond level 10 (or even get to level 10), which makes it not as great as other things that can be put in a city of someone who doesn’t fight a lot. Kraken gives a bonus called “First Strike” which will potentially kill one unit of the enemy’s army at the start of a battle a certain number of times a day. So it’s a limited number of uses, and only a small chance of activating. It is extremely satisfying when you do see an enemy unit disappear in a puff of purple Kraken tentacles though. As a secondary bonus Kraken does give FPs, but unless you plan to use its primary bonus of First Strike, it’d be very expensive to plant as a source of FPs and raise to a level where it’s worth having for FPs alone.
Lighthouse of Alexandria
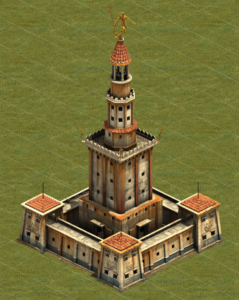 This is one of the first GBs you have a chance to get, and it is absolutely a staple GB that you will have forever. With a very small footprint and a really nice output, this should be one of the first things you get into your city and work to raise up. LoA’s primary bonus is to offer a percentage-based boost to the number of supplies you collect for a certain number of collections a day. The percentage and the number of times you can use it goes up as you raise the level of this GB. It’s important to note, too, that this boost works on any building that is not a GB. So all those special event buildings that you’ve won which give supplies will also qualify for this bonus. It seems trivial, but it really adds up, especially since supplies are harder to get than coins (coins seem to be a bonus on more of the useful GBs than not, and you get them from aiding regularly, plus from a lot of specialty buildings you’re likely to have like SoKs) and you will need a lot of them for the tech tree later on (and goods production early on). Later on in eras you’ll be able to build RAH, which can stack its supply boost bonus on top of LoAs to give even more supplies a day. In addition to the supply boost, you also get goods (unrefined from ME and beyond). It seems like something that’s skewed to be for a goods-based player and farmer, but there will never not be a time that you need supplies which is why it’s a GB that every player needs.
Lotus Temple
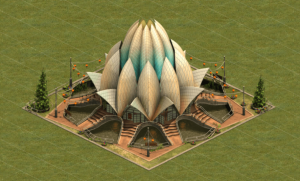 This is among the GBs that are recommended to never, ever be built for the fact that they’re useless even as a stepping stone. You may also notice that most of them offer the same two rewards too, medals and happiness. Lotus Temple is among the useless GBs, but unlike most of them it offers coins and happiness. The reason why it’s recommended to not build is because you will get the coins from plenty of other sources, and as far as happiness it really doesn’t give enough to make that big of an impact compared to other GBs you will build or have already built. So this is a GB that it’s best to just admire from the BPs in your inventory, of which FoE will eventually make sure you have plenty of.
Notre Dame
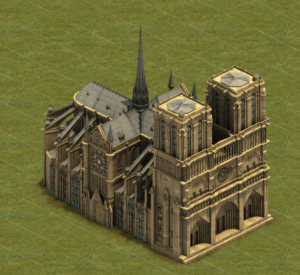 This is among the GBs that are recommended to never, ever be built for the fact that they’re useless even as a stepping stone. You may also notice that most of them offer the same two rewards too, medals and happiness. Notre Dame is among the useless GBs, but unlike most of them it offers supplies and happiness. The reason why it’s recommended to not build is two-fold: first and foremost, the amount of supplies it gives is negligible and doesn’t scale up well as you spend FPs to level this GB up; and as far as happiness goes not only does it not stand up to the test of time, but it also doesn’t give enough to make that big of an impact early on for the amount of space it’s going to take up (and if you think your city is full from event items and such, remember when you had barely any expansions to work with… yikes). So this is a GB that it’s best to just admire from the BPs in your inventory, of which FoE will make sure you have plenty of.
Observatory
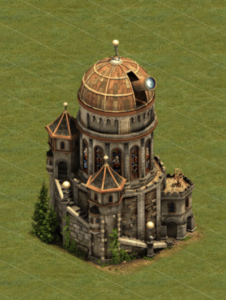 Observatory is the only truly selfless GB in the game, and unfortunately it is pretty difficult to obtain. As far as the individual player goes it does nothing to enhance game play. This is a GB intended solely for benefiting a guild. It has no era, and the only way to get BPs are to win them during an event, or earn them from a reward spot on another player’s Observatory (if you don’t buy them with diamonds). Thankfully, it is an extremely small footprint and is really cheap to build (low age goods) and not expensive to bring to level 10. It’s not really a GB that’s worth taking beyond level 10 so you don’t have to worry about collecting a ton of BPs at least. This GB donates goods to the treasury in a small amount (but enough to cover your participation in GE as far as current-era goods are concerned), and offers support pool to the guild. Of all the GBs that offer support pool, this is the one to have. A GvG guild will often request that all their members have Observatory for this very reason. Even though other GBs do offer support pool, Observatory is really the only one truly worth building. Arc and Atom both provide far more goods to the treasury, but neither offer that support pool. So if you are truly an upstanding guild mate, you’ll do what you can to obtain Observatory (but no one should ever expect you to spend diamonds to do so, if they do find better people to play this game with).
Oracle of Delphi
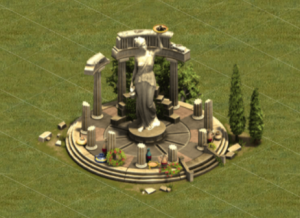 This quaint little GB is earned in the early stages from a quest line teaching about BPs and GBs. It’s not something that you can get BPs for outside of that quest line and by placing on the GB in a reward spot, and that’s fine because it’s not a GB you will keep. Oracle offers supplies and happiness in a small footprint, but it will not stand up to the test of time. It will very quickly outgrow its usefulness, and you will find that there are other buildings that could better serve you in the space that it occupies. Still, it does serve a purpose of teaching the beginner about how to earn BPs, how to build a GB, and what it means to level one. So as a teaching tool, it is fantastic. Just don’t get attached to this GB because it’s going to be deleted in favor of better things.
Rain Forest Project
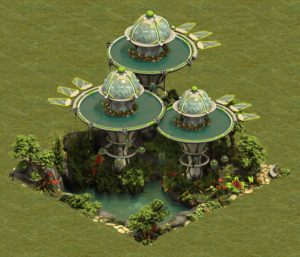 This is a GB that sounds really useful, but truth be told it turns out to not be as useful as one would want it to be. Rain Forest Project takes up a decent footprint and offers goods (unrefined from ME and beyond) and and boost to potentially earn a BP when aiding a person. As far as the goods go, if you are a player that relies on goods and having them available, then you should consider building this GB. It wouldn’t be top-of-the-list or must-have, but it would be useful to you. If you are a fighter and don’t have nearly as much use for goods, then you do not want to waste precious space in your city with this GB. It sounds like the bonus to potentially get BPs when aiding is really desirable, but truth be told once you get Arc you will find that you earn plenty by placing on other GBs. The need to increase the odds that you might get one while aiding diminishes rapidly once Arc is acquired, making the secondary bonus on this GB not nearly as awesome as it otherwise sounds.
Royal Albert Hall
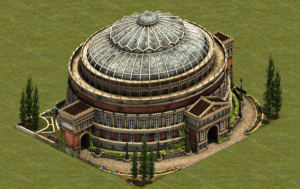 Like LoA, this is a GB that offers a boost to your supply collection for a certain number of collections a day, making it a very desirable GB to acquire. It is much larger and more expensive than LoA, but because the boost will stack with LoA it makes it a pretty powerful acquisition for any player (please bounce back to LoA to understand why). Many find this to be a very useful GB to get, but there are ways to play without needing to build it should you require the space for other stuff. So while it’s highly recommended, if you have to pick between it and LoA, go with LoA. In addition to the supply boost, it creates goods (unrefined from ME and beyond).
St. Basil’s Cathedral
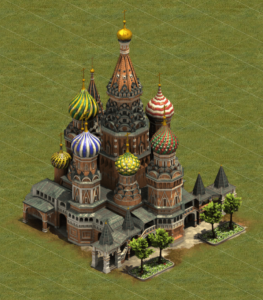 This is a GB that is used mainly to offer defense to a city, and for that fact it’s not always recommended to build. On the plus side, it does have a much smaller footprint than Deal Castle, so if you really want one of them, this would be a better option. Like Deal Castle though, you can get more defense in that same space just building basic watchfires instead. Basil will offer you what’s called “Fierce Resistance” and coins as its two bonuses. Fierce resistance is a boost to your home defense army’s attack and defense power (it doesn’t help the units you’re using to attack with at all), and a donation to the guild’s support pool (support pool is how GvG sectors get defense bonuses when held by your guild). Even as something that offers support pool, it’s usually not recommended. As far as the coins are concerned, you’re going to have plenty of other, better, GBs in your city that will give you a coin bonus (a lot of GBs offer this); plus you can get coins from aiding and many other special buildings (like SoKs), so it’s not really worth building Basil for the coins either. Ultimately, even if you do build Basil you may find that you tear it down later on to put in something better, so don’t invest too heavily in it and definitely don’t take it beyond level 10.
St. Mark’s Basilica
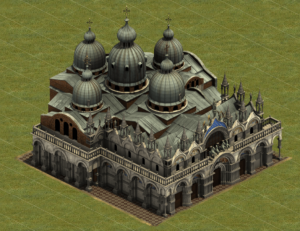 Many may overlook this GB because of it’s massive size early on in the game, but it’s actually a really good GB to consider. If you are a goods-based farmer player, then you absolutely need to put in St. Mark’s. For its size, this GB offers a lot of goods (unrefined at ME and beyond) so it is well worth the space. On top of that, it offers a bonus to the coins that you collect a certain number of times a day. It is the early-era equivalent of LoA, but for coins. It’s just extremely daunting because of the footprint. Even if you do not have the space in HMA right away to get it planted, you should keep an eye out to make the space as soon as you’re able to plant it, eventually. Since it’s a lower era GB, it’s also pretty inexpensive to take beyond level 10, and it is worth doing so with for the goods alone. Like LoA, the coin boost will also work on event and specialty buildings (just not other GBs), so you can earn a lot of coins rapid-fire with even just a level 10 St. Mark’s.
Seed Vault
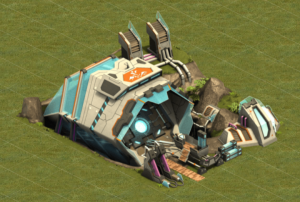 Seed Vault is a GB that is an optional build, based on your own individual play style. If you do a lot of plundering, this probably isn’t the GB for you because it works off of aiding other players. This bonus is called “Helping Hands”, and it is a chance to earn a reward every time you aid someone. So if you’re in the habit of only aiding, and aiding a lot of people regularly (guild mates, friends list, and perhaps even all your neighbors), this would be a really good GB to consider planting in your city. Those resources will range among coins, supplies, goods, medals, and possibly (though very rare) diamonds. Since it is only a chance to earn the resources, it will likely come in waves for when you are getting extra goodies and when you aren’t. Along with helping hands, Seed Vault will give you supplies upon daily collection.
Space Carrier
 This is the only GB that is being released for Space Age Asteroid Belt (SAAB for short), and it’s the match to Himeji Castle in a way based on its secondary ability, Diplomatic Gifts. Of the GBs out there that a farmer/negotiation play style will desire, this is one that isn’t recommended to get too early on. First and foremost it’s expensive in general because it is such a late-era GB just to take it to level 10, but the other reason is its primary ability to give special goods does not kick in until you reach Arctic Future. In Arctic Future you need Promethium, in Oceanic Future we add in Orichalum, nothing new comes from Virtual Future, and then so far both SAM and SAAB have each added in their own special good. Special goods are something you cannot trade for, which makes them a bit harder to procure. Prior to AF this GB will give you medals, and once in AF and beyond it will randomly produce each day one of the special goods that match your era or below. So the more eras it has to choose from, the more watered-down your chances of getting the special good you need. For this reason it is a personal choice GB for those who hardly, if ever, negotiate. If you tend to do most of your GE and GBG with negotiations then this GB will be great for you, especially at higher levels, because it might produce a random reward of goods, FPs, diamonds, rogues, or a selection kit consisting of a choice between a Wishing Well, Wishing Well Shrink Kit, or Renovation Kit upon a successful negotiation a certain number of times a day. Basically it behaves similarly to the Himeji Castle when you fight. If you’re a balanced player who does put some effort into negotiations, this might not be a bad choice for you as well. The key here though is that in order to make this GB shine you have to be ready to push it beyond level 10, so don’t plant it too early. Establish yourself first, then look into this one.
Space Needle
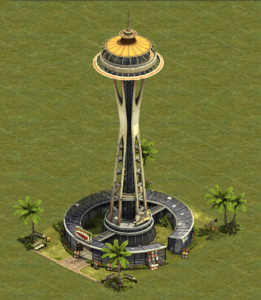 This is among the GBs that are recommended to never, ever be built for the fact that they’re useless even as a stepping stone. You may also notice that most of them offer the same two rewards too, medals and happiness. Space Needle is among the useless GBs, but unlike most of them it offers coins and happiness. The reason why it’s recommended to not build is because you will get the coins from plenty of other sources, and as far as happiness it really doesn’t give enough to make that big of an impact compared to other GBs you will build or have already built. It may not appear as such, but Space Needle actually as a really large footprint at 6×5. That’s a lot of space that could be used for something that gives you a much bigger benefit, like SoKs or heck, even Hagia Sophia. In the end it’s a space hog for some coins and happiness, and ME goods are a bit more expensive since they’re refined, and in ME GBs naturally cost more FPs than some of the early GBs that are more useful than this one. So this is a GB that it’s best to just admire from the BPs in your inventory, of which FoE will make sure you eventually have plenty of.
Star Gazer
 When Star Gazer was first released with Mars there was a lot of controversy as to whether this GB was worth the space it would take up. After all, Inno has been good to us with releasing a lot of nice event buildings to make goods, so did we really need such a GB? Turns out with the release of GBG, we do. Star Gazer only has one function, and that is to produce goods of the previous era from the one you’re in (and if you somehow manage to build this in Bronze Age, you’ll just get Bronze Age goods). That’s right, this is the first GB that will produce refined goods instead of unrefined upon collection! Before the release of GBG though it was possible to just get the goods you needed from GE, trading, and event buildings. The attrition rates in GBG though and the fact that negotiations can be very costly gives this GB a whole new spark, and a purpose. If you’re someone who does a lot of negotiating, especially in GBG, then you’ll do well to add this GB to your city. At level 10 alone it’s producing 50 goods, which is about 2 goods per square. That’s a fantastic rate for refined goods!
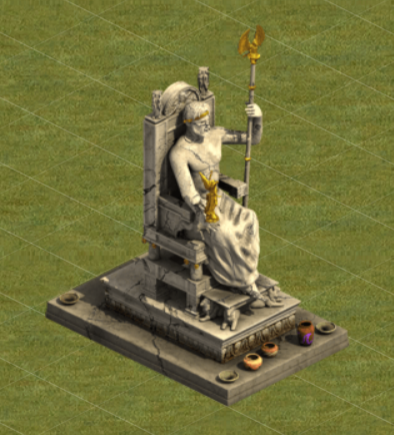
Statue of Zeus
 Statue of Zeus is one of the three GBs referred to when a player mentions the fighting trifecta (the other two are Castel del Monte and Cathedral of Aachen). These three GBs are basic for any play style because of the fact that they assist with fighting and are not expensive to acquire. Even if you are a player that deals with goods most of the time and doesn’t fight, there are situations in which a quest or activity demands to that do fight. At that time these GBs, at least to level 10, will assist you. For a primary bonus they offer additional attack and defense bonuses to the units you are using to attack with (so not your home defense), and that can make a huge difference even early on in their levels! Unlike the other two in the trifecta, Zeus actually only gives this one bonus. Thankfully, it is the smallest footprint of any GB at 2×3, so it’s not only easy to acquire, but easy to find room to plant it too. If you mainly work with goods, then this is not likely to be a GB on your radar to push past level 10, but for a fighter you’re going to want to raise this one up decently (it just might not be the first one you work on).
Temple of Relics
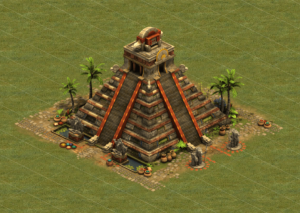 Temple of Relics is a GB designed solely to offer the player a chance at extra goodies in the form of relics during their play-through of the weekly GE competition. It has no other bonus beside offering a chance to spawn a relic after each encounter completed. Part of the bonus also talks about how likely you are to get a rare relic, but real talk: Gold Relics are where it’s at. Jade Relics seem really cool and awesome, but Gold ones tend to be the most useful (especially when they drop 100 FPs or a ton of goods), followed by Silver Relics which offer the chance at troops (especially good if you era’d-up right after GE started so you can prepare for the following week). Unlike chests, relics will always be for your era, so if you age up during GE they will give stuff for your current age. The chests still give for the age you were when GE opened. Since it is a GB for GE, the only way to get the BPs are via GE or placing in a reward spot on someone else’s ToR. It’s typically not worth taking it beyond level 10 either, so all the extra BPs you earn in GE aren’t going to be worth a whole lot.
Terracotta Army
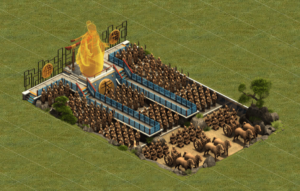 At first glance one would think that this GB was made with fighting in mind, but the reality is that it’s good for both fighting and defending, the first of its kind (as far as eras go). This bonus is called “Advanced Tactics”, and while it’s the only bonus that this GB offers, it is well worth planting for that bonus alone. Advanced Tactics offers an attack and defense boost to both your army that you’re currently attacking with, and to your home defense army that is going to defend your city against attackers. Since it does both, it’s absolutely worth planting by any player. Since it is a VF GB though, it is expensive to plant, and expensive to take even just to level 10. Fighters at the very least will want to take it beyond level 10 eventually, but everyone else will want to consider if the FPs could be better spent elsewhere since it will be very expensive.
Tower of Babel
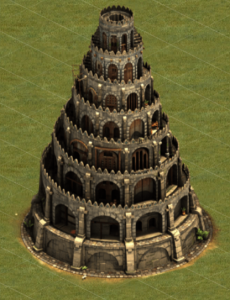 Tower of Babel is likely to be one of the first GBs that you plant, and probably one of the first that you will also tear down later on. This GB offers some population, but it’s truly negligible compared to the amount that you’re going to need (especially in the long run), so it isn’t able to keep up as you age-up. Of the GBs that offer population, it is at the bottom of the usefulness pile. In addition to population, it offers goods (unrefined at ME and beyond), and the ratio of goods to the space it occupies isn’t that bad. So for someone who is really avid about goods and has a more farmer approach to a play style, this might be a GB that you keep for a lot longer than another player. You might find you can get use from it forever, but likely there will be something else that serves you much better for the space it takes up (even though that isn’t much, either). It’s just one of those GBs that are really great early on for something, and then later on it gets phased out by newer, better models of GBs. So if you do build this, and do intend to keep it for a while, it’s best to not invest too heavily into it (and certainly not take it beyond level 10) knowing that you’re likely to get rid of it later on. No point putting FPs into a GB, even as cheap as ToB, when you know that you’re going to eventually remove it.
The Virgo Project
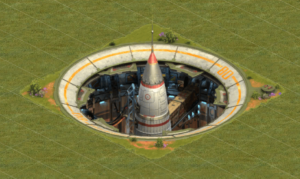
Virgo Project is one of those funny GBs that you’re likely either going to love or hate, and for that reason it’s very much personal choice. The benefits Virgo Project has to offer are a lot of coins (since it’s a Mars GB), and the potential to defeat half the enemy troops upon entering a battle. Now, the battle thing probably sounds awesome, but keep in mind that it doesn’t work in the neighborhood PvP. So if you’re thinking it’d rock for attacking your neighbors, think again. Inno has no intention of restoring that function, as it was deemed too problematic. In addition, the ability to defeat those units is only a percentage chance a certain number of times a day. So there are two things to keep in mind when considering building Virgo Project: first, do you plan to level it well up into the 60s or above to get the percentage to at least 50% or more that it will fire, and two, are you willing to time its collection so that you can best use those few chances? Even well up into the 60s, Virgo Project only fires five times (this seems to possibly be the cap). So it sounds awesome, but it’s really in the too-good-to-be-true camp unless you’re super willing to time it.
Truce Tower
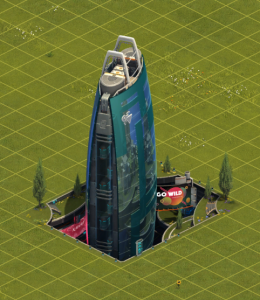 This is a GB that could be argued to be useful for all play styles, but the styles it is going to benefit the most are those who are balanced players, or who use goods for the majority of their game play (negotiators). This is because TT offers a random good from the era of a building that you motivate/polish when you aid another player a certain number of times a day. On the outset this might not sound exciting, but the charm of it comes in when you have players from eras that are above your own, and you aid them and get goods that would be difficult to trade for which you cannot yet create. So you might have gotten this GB ahead of age in ME, and have a player on your friends list in VF, so now you carefully go to that player’s city to motivate/polish a VF building and get a random VF good. Do this seven days a week, and those 7 VF goods could become 896 ME goods if you’re patient with trading down at a 1:2 ratio. That’s a lot of goods! In addition to the bonus of goods when you aid, it also create supplies at a decent rate.
Voyager V1
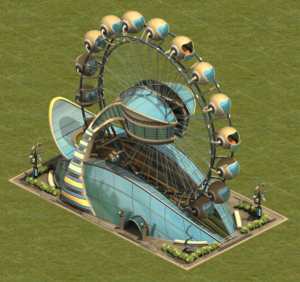 This GB is one that isn’t really useful unless you do a lot of plundering. It is the TE cousin to Dynamic Tower, and where Dynamic Tower offers a random good a certain number of times a day based on aid, Voyager offers a random good that is the same era of a building plundered a certain number of times a day. So you’ll only activate the bonus for getting some extra goods if you plunder people. Unlike Atlantis Museum, it is limited so you could argue usefulness even if all you plunder are the bottom-tier of your neighborhood (you know the players, the ones who clearly are just farming diamonds and/or really don’t have strong cities), but it is 4×7 and a really odd shape because of it so you have to consider if it’s really worth the space. In addition to the goods upon the first few plunders of your day, just like Dynamic Tower it offers supplies at a daily collection. This is probably not a GB that will be in your first pick to take beyond level 10, but if you do plunder a lot it and have the space it might be worth adding to your city. Unlike DT, you’re only likely to plunder goods of your age and below (unless you get in that weird odd-ball hood with a range of eras), so it doesn’t have the same flexibility.


The guide looks heavily biased towards GvG players. For instance, Traz is a _purely_ GvG building, and declaring it “something you want if you do any fighting at all” is a huge overstatement. Non-GvG players will never need that many unattached troops and will be perfectly fine with getting 24 units per week from GE.
I beg to differ. The number of rogues I go through in GE is pretty significant despite having a good boost now that I’m in FE. Not having to worry about where troops are coming from for GE is a godsend. Non-GvG players probably won’t need to take Traz beyond level 10, but it’s still very helpful. Between the troops and the happiness, it’s a good GB to have if you like to fight. Same for if you’re actively working through your hood to attack (and plunder if you choose).
Thanks for this guide. It is very helpful in deciding what to build next. Currently working on level 80 of the Arc but need to decide what to work on next.
Congrats on Arc, that can be tough to do depending on your personal game situation. I’m glad the guide is helpful for deciding where to go next. 🙂
Need to work on attack boost and best unit combination for GE in CE. Current attack boost is 126%. Zeus and CdM are level 11 and Aachen is 10. City defence is 421% but getting attacked by Hover Tanks.
Unfortunately not much you can do against HTs, they’re pretty awesome. Sounds like you’re in a mixed hood. They’re rare, but happen. That, or someone has worked hard to get ahead-of-age troops.
Far as GE goes, you should be good with one AAV and seven rogues, tucking the AAV in a corner and then letting the rogues do the dirty work. 🙂
I don’t comment on many articles but I thoroughly enjoyed reading this. Nice job!
Thanks! Glad you enjoyed it. 🙂
If someone doesn’t want to build Traz and Dresden doesn’t supply enough happiness, then which building to you recommend? I don’t really find event buildings to be space efficient ways to provide happiness.
If you absolutely don’t want to build Alcatraz, and event buildings aren’t cutting it, the GB that provides by far the best happiness/square occupied is the Gaea Statue. The trade-off is that she’s Arctic Future, so more expensive to raise to level 10 (or beyond), not to mention getting the goods for if you aren’t in AF yet. You can reference this article for some more information: Gotta Keep ’em Happy
I think Gaea is a really good building. Yes it’s expensive but space is the most difficult thing to come by in the game, not FPs, not goods, not even diamonds. With Gaea you can continually increase happiness without taking up any more space. FPs and goods will always eventually arrive, you just have to be willing to take a little extra time. Gaea, because it is a high age building, also increases your ranking more than other buildings. Also if you place it well it doesn’t use nearly as much road as the several event buildings you will need to get the same amount of happiness. My Gaea is only touching one square of road. I pulled out several road demanding event buildings to build it and haven’t been sorry at all.
The only other GB I might recommend is Lotus Temple. The other struggle with Gaea would be getting the BPs. Both Gaea and Lotus are GBs you won’t see many of, but since Lotus is in CE (and also really, really cheap to take beyond level 10 compared to some other GBs), it’d also be a good alternative to Traz if you can’t get the BPs for Gaea.
What are your thoughts on the Virgo Project? Also have been have problems opening your more recent posts. It says file not found.
I’m not sure on Virgo Project. It doesn’t work in the hood, and if your attack boost is high enough in all eras except perhaps Mars (because of AR Targeting) it really seems irrelevant. However, when GBG is released we may find that it becomes super useful, so I’ve been waiting to see what GBG brings to the table before I add it into this listing.
As for the recent posts, a couple of them have been released specifically for guild mates (it’s a perk we offer for our guild), which requires special permissions. Unfortunately the email-notification software isn’t customizable to the point where I can stop it from sending those one out. 🙁
Since you had previously asked, I just wanted to let you know that Virgo Project and Star Gazer were just added into the Comprehensive GB Guide tonight. 🙂
Thanks for this guide for great buildings. Probably one of the best I’ve read
You’re welcome. I’m glad you found it helpful. 🙂
This is very helpful. Thanks! What would make it even better is to include the building footprint for each building (maybe under the name or by the picture).
Thanks! I’ll consider adding that information in. 🙂